After a few years of growing, it may become necessary to divide your perennial plants. It is generally best to divide perennials in the late fall or early in spring while they are dormant.
The process of dividing plants is generally a fairly easy task...
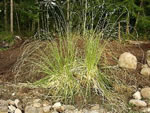
unless you are dividing a 5 foot clump of Pampas Grass like I chose to do. |
 |
|
|
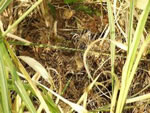
| New spring growth was only appearing at the sides of this clump, leaving a naked, ugly center. This condition happened because too much woody, old growth has smothered any chance for new growth at the center of the crown. Even if a new shoot were to emerge from the woody core, there is very little chance for it's survival. |
 |
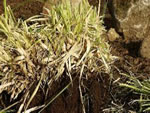
| To begin, I cut the foliage to about 4-6 inches above the crown to make it easier to dig it up completely, and remove this large plant from the ground. Some plants are much easier to divide than others, and can easily pulled apart with just your fingers. Others may require a large sharp knife. Some dense, woody rooted plants may need to be cut into sections with a sharp garden spade (or 2). I started with an axe. |
 |
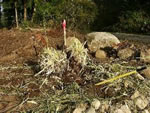
| Begin by lifting the plant from the hole and removing excess soil from the root ball. Fleshy rooted plants should have their roots washed clean of soil so you can see any bud growth. Divide the clump in half using whatever means necessary. (fingers, knife or shovel). You are going to be hacking through roots and plant material so it may sound pretty stupid of me to say to try not to damage the roots... but try not to damage the roots any more than necessary. Sharp garden tools will help. |
 |
|
|
| The first cut will be the toughest because of the hard texture of the core. If you can't make the first division with a single tool, you can use two. Begin by using your garden fork or, if necessary a spade to cut down through the crown. Add a second fork, back to back with the first one. Pull the forks in opposite directions to pry your first divisions apart. |
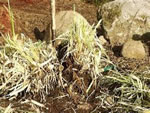 |
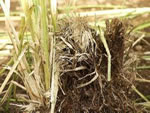
| Continue by dividing each division in half and again in half until you reach the desired size of plant. As it becomes possible, remove smaller divisions from the clump, by pulling them away from the parent plant by hand. Remove ALL dead, damaged or diseased material from each individual division. Discarded material should be composted if there is no evidence of disease. |
 |
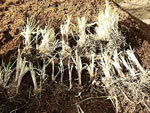
| My Pampas Grass was in pretty rough shape by the time I got around to dividing it, but I did manage to get a good supply of varying sizes of new plants for myself and some friends. The process produced a few single stalks that could produce a new plant because they had a few healthy roots, but avoid divisions that are small. |
 |
|
|
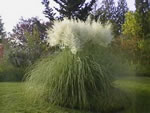
| It is very important that you get your new plants back into the ground as soon as possible, but while the plant is out of its space, it is a good time to get rid of any weeds and improve the planting site by mixing in a generous amount of compost and a little transplant fertilizer to the planting hole. In a few years, each of these divisions will, with luck and care, develop into a healthy, happy specimen plant! |
 |


